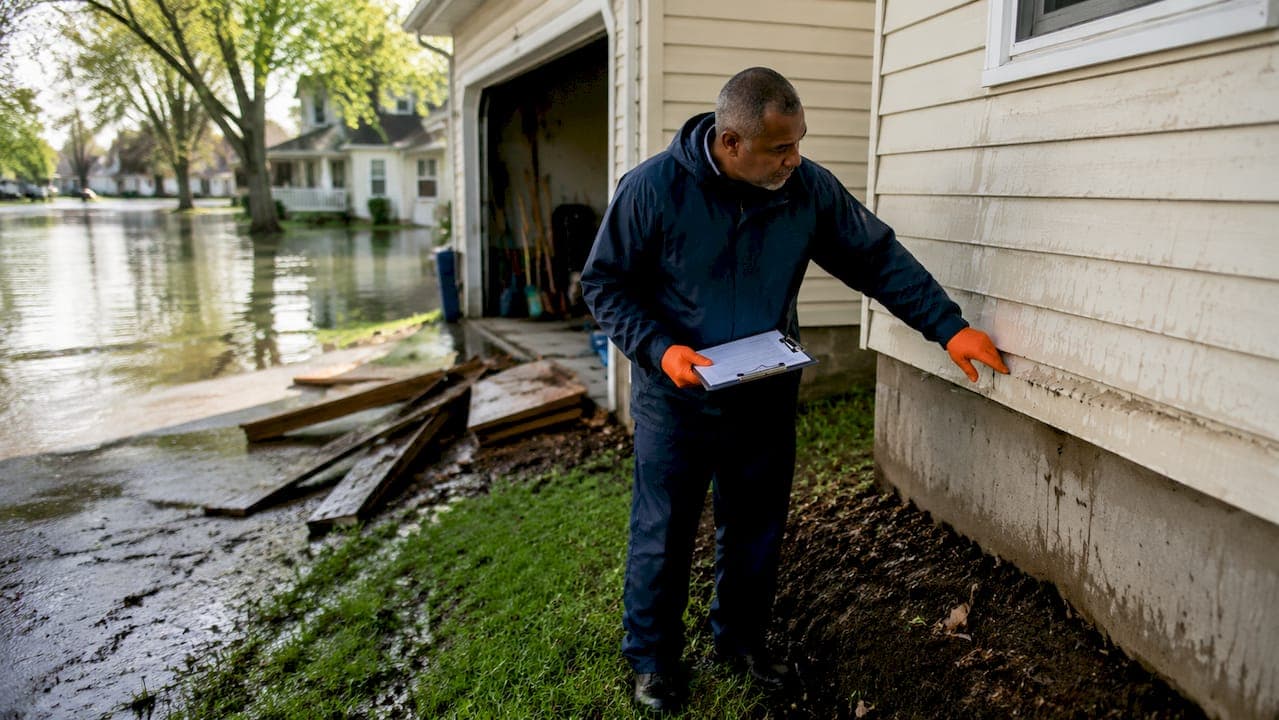
Structural damage assessment after flooding is defined as the systematic inspection of a building's load-bearing and envelope components to determine whether the structure is safe, what has been compromised, and what must be repaired before re-entry. Flooding does not just ruin surfaces. It attacks foundations, subfloors, wall framing, and insulation in ways that are not always visible to the eye. Mold can begin growing within 24–48 hours of water exposure, which means your inspection window is tight. FEMA, the EPA, and current restoration protocols all agree: the faster you evaluate flood damage, the better your odds of saving the structure and controlling costs.
What key signs indicate structural damage after flooding?
Visible damage is the starting point, but it rarely tells the whole story. When you assess structural damage after flooding, you are looking for both surface clues and deeper warning signs that point to compromised load-bearing elements.
Visible warning signs to check first
Start with the obvious. Walk the perimeter before you enter and look for:
- Cracks in walls or foundation: Diagonal cracks at window and door corners signal foundation movement. Horizontal cracks in block or poured concrete walls are serious and indicate lateral pressure from saturated soil.
- Sagging ceilings or warped floors: These point to waterlogged framing or subfloor failure. A floor that bounces or feels soft underfoot has likely lost structural integrity.
- Bowed or bulging walls: Walls that curve inward or outward have absorbed water into the framing and may be losing their load-bearing capacity.
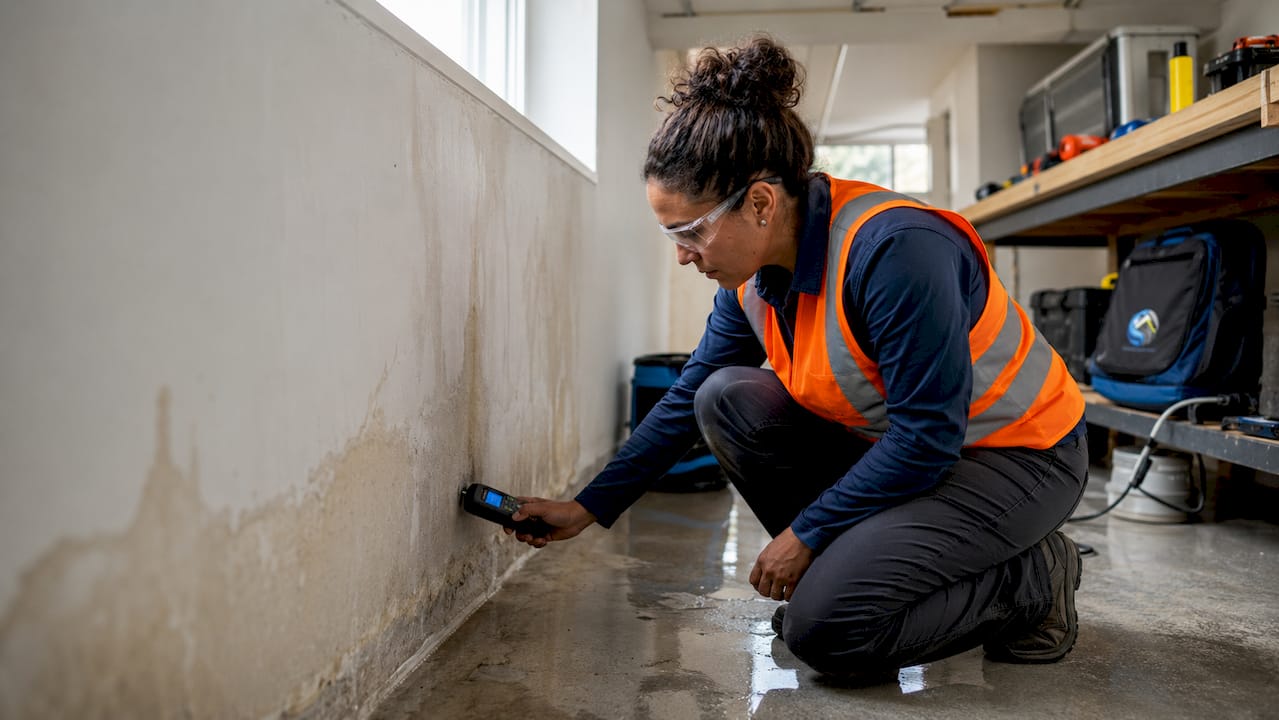
- Moisture staining and discoloration: Yellow or brown tide lines on drywall show how high water reached. Dark staining, especially black or green patches, signals mold has already started.
- Doors and windows that no longer close properly: This is a classic sign of foundation shift or framing distortion.
Hidden damage areas that homeowners miss
Subfloors and crawl spaces are the most commonly overlooked zones in a post-flood property inspection. Wet particle board and insulation typically require full removal rather than drying, because they retain moisture long after surfaces appear dry. A moisture meter is the only reliable way to confirm whether framing lumber, subfloor panels, and wall cavities have dried to a safe level (generally below 19% moisture content for wood).
Pro Tip: Run a moisture meter along the base of every interior wall, not just the ones that look wet. Water travels horizontally through wall cavities and can saturate framing 10 to 15 feet from the original flood entry point.
What tools and preparations are needed for a safe flood damage inspection?
Never enter a flood-damaged building without preparation. Category 3 "Black Water" floodwater contains sewage, silt, and chemicals that pose serious health risks, even after the water has receded. Your safety gear and tools determine both your personal safety and the accuracy of your inspection.
Required safety gear
- N95 respirator or higher (P100 for sewage-contaminated properties)
- Nitrile gloves and waterproof boots rated for chemical exposure
- Safety goggles
- Disposable Tyvek coveralls if sewage contamination is suspected
- Hard hat if ceiling damage is visible
Inspection tools that matter
| Tool | Purpose | When to use it |
|---|---|---|
| Moisture meter | Measures moisture content in wood and drywall | Every wall, floor, and ceiling surface |
| Thermal imaging camera | Detects hidden moisture behind walls | After initial visual sweep |
| Flashlight or work light | Illuminates crawl spaces and attic areas | Crawl spaces, attics, utility areas |
| Camera or smartphone | Documents all damage for insurance | Throughout the entire inspection |
| Notepad or inspection app | Records moisture readings and damage locations | Continuously during inspection |
Thermal imaging is particularly valuable because it reveals moisture pockets that a moisture meter cannot reach without drilling. Dry Rely Water Damage Restoration uses thermal imaging as a standard part of every flood damage evaluation, which catches hidden saturation that visual checks miss entirely.
Before entering, gather any pre-flood building documentation you have: floor plans, previous inspection reports, or photos of the property in good condition. This baseline makes it far easier to identify new damage and supports your insurance claim.
Wait for official clearance before entering any flood-damaged structure. Even buildings that look sound from the outside can have foundation scouring or sub-surface erosion that creates collapse risk.
How do you conduct a step-by-step structural damage inspection?
A thorough structural integrity assessment follows a specific sequence. Skipping steps or working out of order creates safety gaps and missed damage.
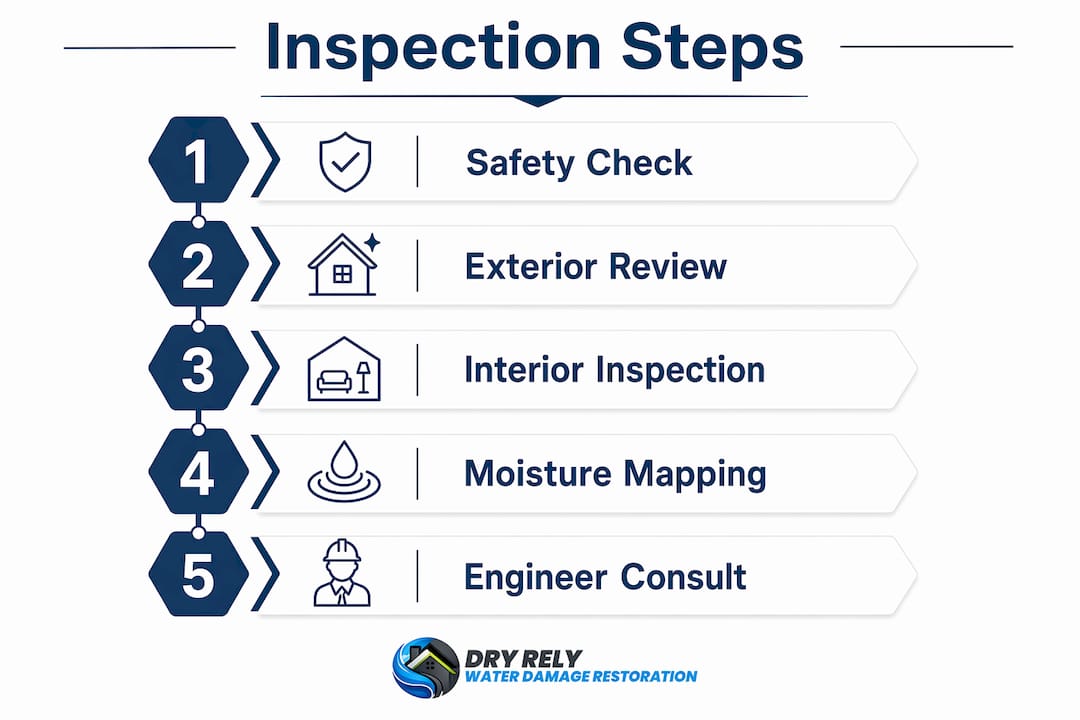
Step 1: Confirm safety clearance and shut off utilities
Do not enter until local authorities have declared the area safe. Once you have clearance, shut off electricity at the main breaker before stepping inside. Water and live circuits are a fatal combination. If you smell gas, do not enter. Call your utility provider immediately.
Step 2: Inspect the exterior envelope
Walk the full perimeter of the building before going inside. Look at:
- Foundation: Check for cracks, displacement, or erosion at the base. Pay attention to corners, which are high-stress points.
- Siding and cladding: Look for warping, separation, or missing sections that allowed water to penetrate the wall assembly.
- Roof and gutters: Check for sagging roof lines, missing shingles, and blocked downspouts that may have directed water toward the foundation.
- Decks and porches: Inspect posts and ledger boards for rot or separation from the main structure.
FEMA HAZUS 4.0 data shows that structural damage ratios increase sharply with flood depth, from roughly 15% damage at 1 foot of inundation to over 50% at 8 feet. Knowing your flood depth helps you calibrate how aggressively to inspect.
Step 3: Conduct the interior inspection
Move from the lowest level upward. In the basement or ground floor, check:
- Floor joists and beams for warping, cracking, or separation
- Load-bearing walls for bowing, cracking, or soft spots
- Ceilings for sagging, water staining, or collapse risk
- Insulation in walls and ceilings (wet insulation must be removed, not dried)
Prolonged water exposure of 3 or more days causes exponentially more structural degradation than water that recedes quickly. If your property was inundated for several days, treat every structural element as suspect until proven otherwise.
Step 4: Map moisture levels and document everything
Use your moisture meter to take readings at every wall base, floor section, and ceiling area. Record each reading with its location. Photograph every crack, stain, and area of concern. Meticulous documentation, including photos of cracks, load-bearing member deformation, and moisture readings, is the foundation of a successful insurance claim. Adjusters rely on this evidence to approve repair costs.
Pro Tip: Take photos with a ruler or tape measure in frame next to cracks and damage. This gives adjusters an accurate sense of scale and prevents disputes over repair scope.
Step 5: Know when to call a structural engineer
If you find bowed walls, cracked foundations, or any sign of foundation movement, stop your inspection and call a licensed structural engineer. Forensic engineer reports are often the only acceptable evidence in insurance disputes involving foundation shifting, bowed walls, or delayed damage symptoms. A professional report protects both your safety and your claim.
What mistakes do homeowners make in post-flood damage assessment?
Flood impact evaluation goes wrong in predictable ways. Knowing these pitfalls in advance keeps your inspection accurate and your restoration on track.
- Ignoring how long the water sat: Inundation duration dramatically amplifies damage beyond what water depth alone suggests. A property flooded for five days needs a far more aggressive inspection than one that flooded for five hours.
- Relying only on visual checks: Surfaces dry faster than structural framing. A wall that looks dry can hold 30% moisture content inside the cavity. Always use a moisture meter.
- Waiting too long to check for mold: Mold growth begins within 24–48 hours. Delaying your mold prevention steps beyond that window turns a drying problem into a remediation problem.
- Skipping professional evaluation when structural signs appear: A rapid visual assessment is a safety triage step, not a substitute for professional remediation planning. If you see structural warning signs, a licensed engineer must evaluate the property.
- Failing to document damage before cleanup: Once you start removing wet materials, you lose evidence. Document everything before touching a single piece of damaged drywall or flooring.
"Accurate damage evaluation with thorough documentation is key to successful insurance claims and mitigating homeowner financial loss." — restoration industry standard practice
Key Takeaways
Assessing structural damage after flooding requires safety clearance first, systematic inspection second, and thorough documentation throughout to protect both your property and your insurance claim.
| Point | Details |
|---|---|
| Act within 24–48 hours | Mold growth begins fast; early moisture mapping prevents structural and health damage. |
| Use moisture meters, not just eyes | Hidden saturation in wall cavities and subfloors requires measurement tools to detect. |
| Document everything before cleanup | Photos and moisture readings are required evidence for insurance claims and repair scopes. |
| Call a structural engineer for serious signs | Bowed walls, cracked foundations, or floor collapse risk require professional forensic assessment. |
| Duration matters as much as depth | Water that sits for 3 or more days causes far greater structural degradation than a quick flood. |
What we have learned from 15,000+ flood-damaged properties
After restoring over 15,000 properties across South Florida, the pattern is clear: homeowners who wait underestimate the damage, and homeowners who rush in without safety gear put themselves at serious risk. Both mistakes cost money and time.
The most common misconception we see is that a property looks fine from the street, so it must be fine. That is rarely true after significant flooding. Foundation scouring, saturated subfloors, and compromised wall framing are invisible from the curb. We have walked into homes that passed a quick visual check but had moisture readings above 40% in the wall framing, with mold already colonizing behind the drywall.
The second misconception is that homeowners can skip the structural engineer if the damage "doesn't look that bad." Insurance adjusters know this. When a claim involves foundation movement or bowed walls, they will ask for a forensic engineer's report. Without one, claims get undervalued or denied. Getting that report early, before cleanup begins, is the single best financial decision a homeowner can make after a serious flood.
Safety clearance is not a formality. We have seen properties where the above-ground structure looked intact but sub-surface erosion had undermined the slab. The first 24 hours after water damage are critical, but they must start with a confirmed safe entry, not a rushed one.
— Dry Rely Water Damage Restoration
How Dry Rely Water Damage Restoration helps after a flood
When flooding hits your South Florida property, you need a team that can evaluate damage fast and start protecting your structure immediately.
Dry Rely Water Damage Restoration guarantees certified technicians on-site within 60 minutes of your call. The team conducts full moisture mapping with thermal imaging, identifies both visible and hidden structural damage, and begins professional water extraction to stop further degradation. Dry Rely also provides certified mold removal and remediation and supports homeowners with detailed damage documentation for insurance claims. With a 4.9-star rating from over 200 reviews and more than 15,000 properties restored, Dry Rely Water Damage Restoration delivers the speed and expertise your property needs right now. Contact the team for emergency water damage response available 24/7.
FAQ
How soon should I assess structural damage after flooding?
Start your assessment as soon as authorities declare the property safe to enter, ideally within the first 24–48 hours. Mold growth begins within that same window, making early inspection critical to limiting both structural and health damage.
Can I assess flood damage myself or do I need a professional?
You can conduct an initial visual and moisture check yourself, but a rapid visual assessment is only a safety triage step. Any signs of foundation cracking, bowed walls, or floor collapse risk require a licensed structural engineer or certified restoration professional.
What is the most important tool for a post-flood property inspection?
A moisture meter is the single most important tool because it detects hidden saturation in wall framing, subfloors, and ceilings that visual checks cannot find. Thermal imaging cameras add a second layer of detection for moisture behind finished surfaces.
Does flood duration affect how much structural damage occurs?
Yes. Water that sits for 3 or more days causes exponentially more structural degradation than water that recedes quickly, particularly in subfloors and foundations. Duration is as important as flood depth when evaluating total damage.
What documentation do I need for a flood damage insurance claim?
Photograph every crack, stain, and area of concern before cleanup begins. Record moisture meter readings with their locations. For foundation or structural displacement issues, a forensic engineer's written report is often required to resolve insurance disputes.